
Getting Started with Multi-Tenancy on OutSystems

Hello hello!!
Have you ever heard about Multi-tenancy on the OutSystems Platform?
Let’s say we want to deliver the same software for different customers, but they can NOT access each other’s data at any moment. You should know that OutSystems is already prepared to handle this and give us a straightforward and practical solution for this challenge. This functionality is called Multi-tenancy, which we will discuss in this article.
What is Multi-Tenancy, and how it works
Multi-tenancy is the capability to isolate data, configurations, and users between existing islands in the application, and each island is called Tenant. The OutSystems platform allows us to set up the Multi-tenant property to the following elements: Module, Entity, Site Property and Timer.
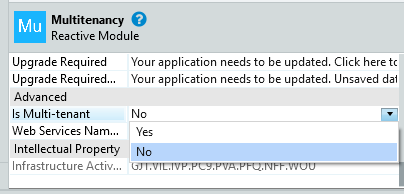
Image 1 – Multi-tenant module option
When the Multi-tenant property is set to Yes in a Module, the data, end-users, sessions, and processes belonging to this module are isolated per tenant by default. However, if the property of each element is defined, the value of this property in the element overrides the value set by the module. Thus, the elements that do not have a set value for the Multi-tenant property inherit it from the module property’s value.
Create a Tenant
Creating a Tenant couldn’t be simpler: there is a system’s Server Action (TenantCreate) to do it for us, and we just need to build the logic around it. All tenants created are stored in the Tenant entity, a system entity.
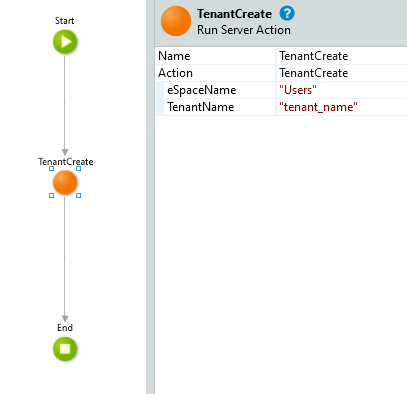
Image 2 – TenantCreate action
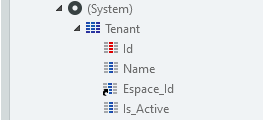
Image 3 – Tenant Entity
We can also change the selected Tenant using another system’s Server Action: TenantSwitch. We should remember that the session is cleared after performing this action.
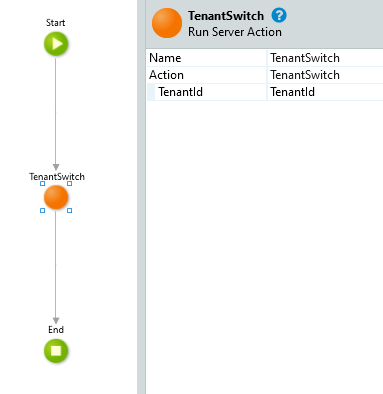
Image 4 – TenantSwitch Action
Entities
We can find the Multi-tenant property of an entity in its Advanced tab in More… property option. When it is set to Yes, the entity icon has a minor but crucial change: a new attribute is created on the entity called TenantId.
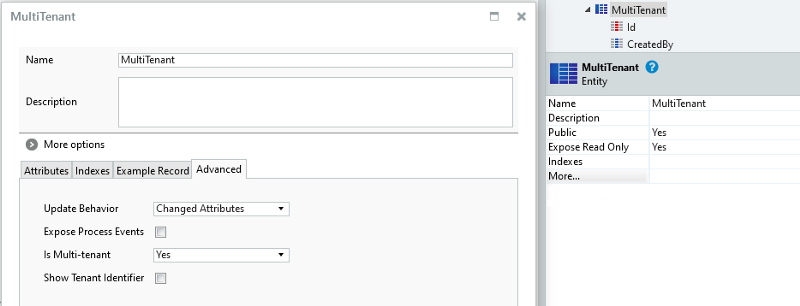
Image 5 – Multi-Tenant property and entity
Once this property is set to Yes, all the entity’s data is isolated per Tenant, and its aggregates/SQLs are only executed in the current Tenant.
Another property can help us in some scenarios: imagine we want to control a tenant’s data ourselves. For this purpose, the entity has a property named Show Tenant Identifier, and we can find it in the Advanced tab in More Options. Using this option, the Tenant_Id property is exposed, and the entity icon turns red.
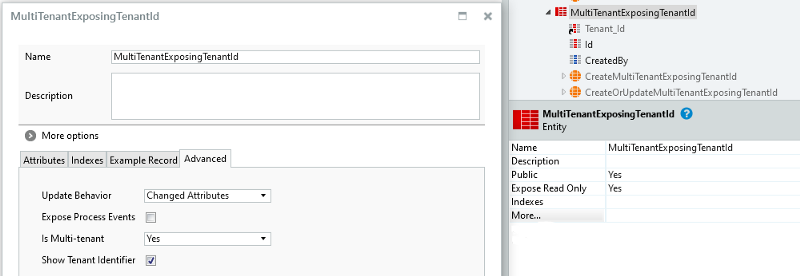
Image 6 – Show Tenant Identifier property and entity
But bear in mind: by activating that property, we disable the automatic data isolation for the entity. In other words, we must guarantee the data isolation ourselves and prepare aggregates/SQLs to handle it.
Both properties (Multi-tenant and Show Tenant Identifier) are set by module so we can have different configurations for each module. Keep in mind we want to have a consistent performance for an entire application, and having different configurations for each module can be messy. Do it responsibly.
Static entities do not have the Multi-tenant property since their data must be shared among tenants. As well as external entities, since they are not in the OutSystems domain, we can’t change the table’s structure.
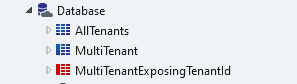
Image 7 – Entities with different icons
End-Users
End-users belong to a single tenant. If we use the default Users application to perform user management, end-users are automatically bound to their tenant during the login process. We just need to ensure the uniqueness of user names across all tenants.
We can change the tenant of an end-user in the database or with code. Still, it is not recommended: if we try to fetch the user to show some information (like the user’s name using the createdBy attribute), the application will not find the specific user (because we changed it to another tenant) and will throw an exception.
Timers and Site Properties
Having a timer’s Multi-tenant property set to Yes allows this Timer to run once for each tenant and only manipulate data for that tenant. If it is set to No, this Timer runs once and manipulates data for all the tenants.
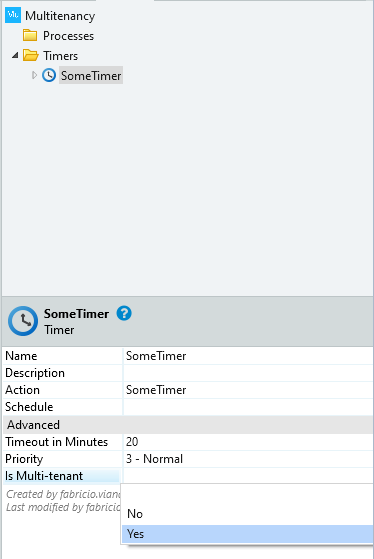
Image 8 – Multi-tenant option in Timers
In a Site Property, turning this property to Yes will allow us to specify the Site Property’s value for each tenant. In other words, setting it to No will allow the value to be shared among tenants.
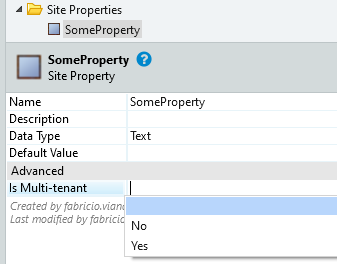
Image 9 – Multi-tenant option in Site Properties
We can configure or deactivate a timer to not run for a specific tenant and change the value of a Site Property for each tenant in the Service Center. Go to the Module configuration in the Factory menu and select the module. Then go to the Tenant tab, select a tenant, and see the Site Properties and Timer tabs.
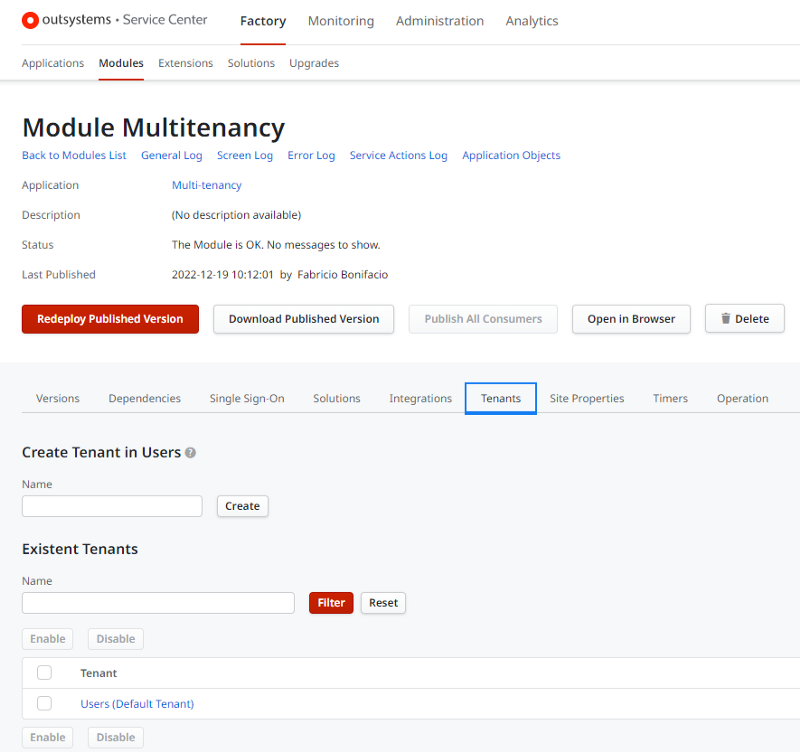
Image 10 – Module configuration in Service Center
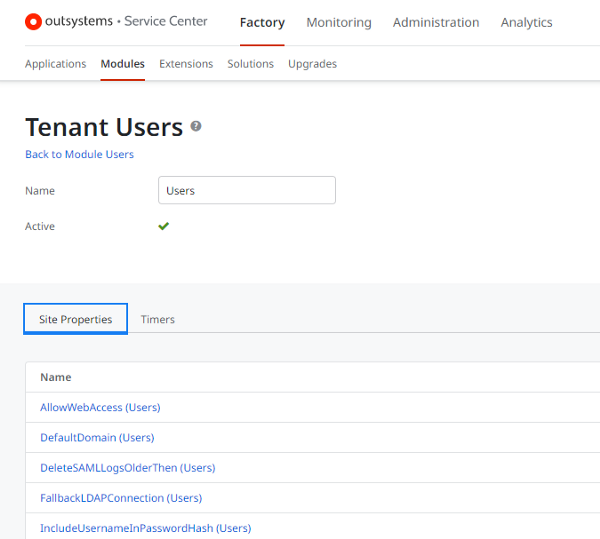
Image 11 – Multi-tenant Site Properties configuration in Service Center
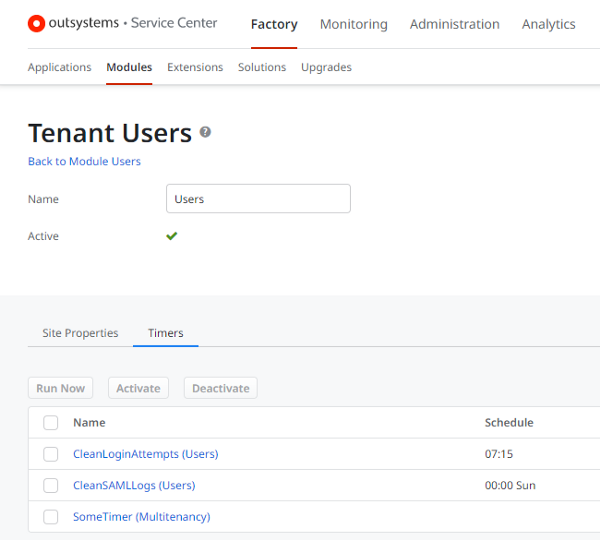
Image 12 – Multi-tenant Timer configuration in Service Center
Development tips
In Multi-tenant Applications, we must select a tenant when testing queries. What does this mean? There is an option (Configure Tenant to Test Queries) in the Module menu in Service Studio, where you choose the tenant you want to see the data from. So, whenever we open a multi-tenant module, we must select a tenant to guarantee we access the correct data.
But don’t worry. You will forget about this option and think your queries are wrong. :D
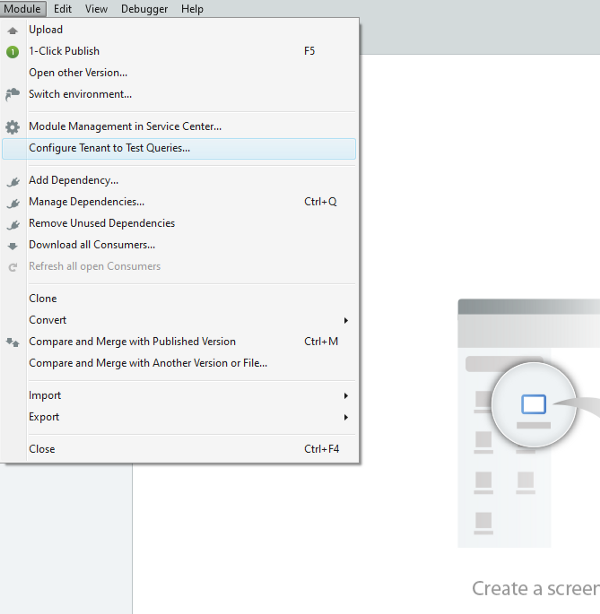
Image 13 – Configure Tenant to Test Queries menu option - step 1
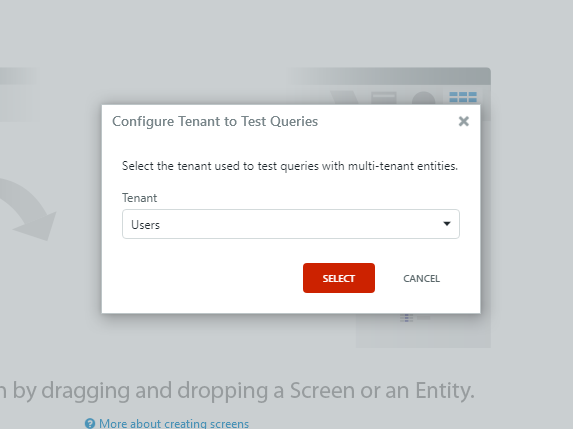
Image 14 – Configure Tenant to Test Queries menu option - step 2
Additionally, when joining an entity that exposes the Tenant Identifier (property Show Tenant Identifier) and a normal Multi-tenant entity in an aggregate with the option Configure Tenant set to Test Queries, we don’t need to filter by TenantId. It is done automatically since you have a normal Multi-tenant entity in the query.

Image 15 – Join Entity with different properties
In conclusion
We can take massive advantage of the OutSystems Multi-tenancy functionality since it saves us time and makes the development more straightforward. Still, on the other hand, we need more caution and responsibility to handle entities, end-users, timers, and site properties.
To finish up, I’ll leave a great component from the forge I use on my Multi-Tenant projects to handle user management and tenant creation:
Additional Resources:
Like this article? Share it:


