
Crafting Custom Logging & Change Tracking in OutSystems — Part 2: The UI Layer and Use Cases

In the dynamic world of OutSystems application development, creating effective logging and change-tracking components is not just expected but crucial. Each application demands a unique, tailor-made approach, and we often need additional features after implementation—a challenge that becomes increasingly complex over time.
Drawing from years of experience, I've developed a set of versatile patterns designed to integrate seamlessly into any application. These patterns are not only adaptable for end-users across technical and business domains but also efficient in managing (sub)status for BPT workflows.
This two-part series aims to guide you through the intricacies of establishing a robust logging and change-tracking system in OutSystems. In the first installment, we delved into the Core component, laying the groundwork for effective application management. This part will shift our focus to the UI Layer and explore Use Case Patterns, further enhancing your toolkit for OutSystems development.
UI Layer
For the UI layer of this logging component, the more straightforward option would be to have a separate UI layer app with an exposed web block to use embedded in as many places as needed.
But this is the simplistic approach because if we have different apps with different look-and-feel, different themes, or different patterns of presenting the logs, it may justify the existence of more than a single UI layer app or individual OutSystems modules (in a single app) for different consumer applications as needed.
This article will focus on a single exposed web block scenario, like the one in the image below.
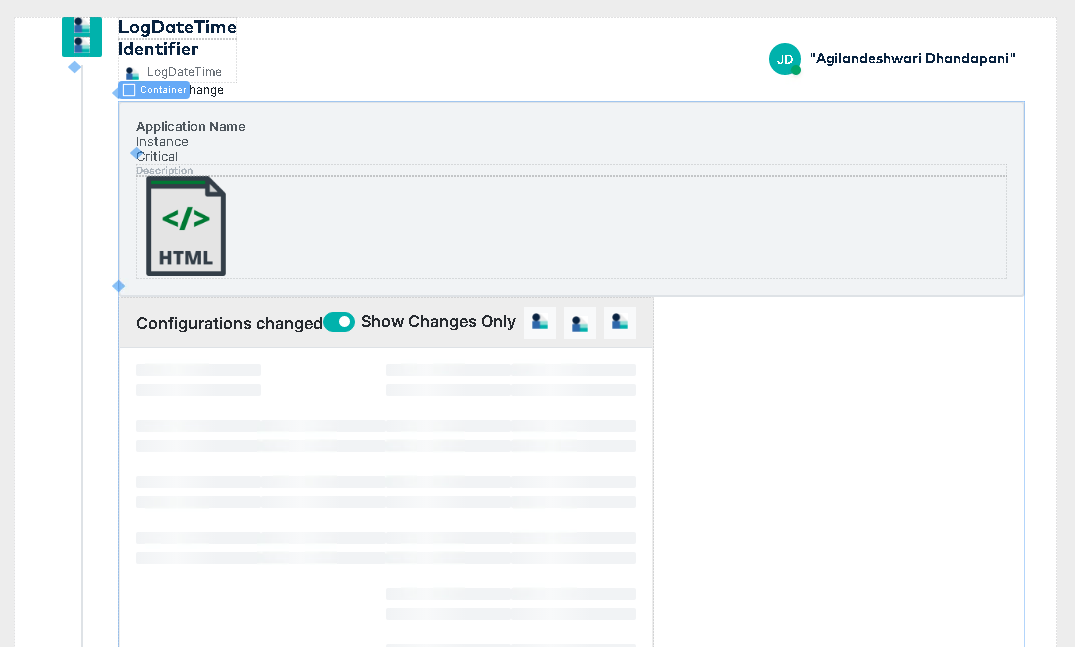
Image 1 – UI Layer Web block
This web block has the following input parameters:

Image 2 – Web block input parameters
LogApplicatioId [Mandatory] – This mandatory field identifies the Application concept from the “LogApplication” static entity to filter the log entries specifically for that app.
Identifier [Mandatory] – A mandatory field that identifies the business object sequence of logs or changes that you want to filter upon.
OnlyDiff – Boolean field, True by default, will display only the modified or all the fields from a dataset logged for track changes if present. This would set the default behavior of the list, but it is possible to override this in the UI per log entry.
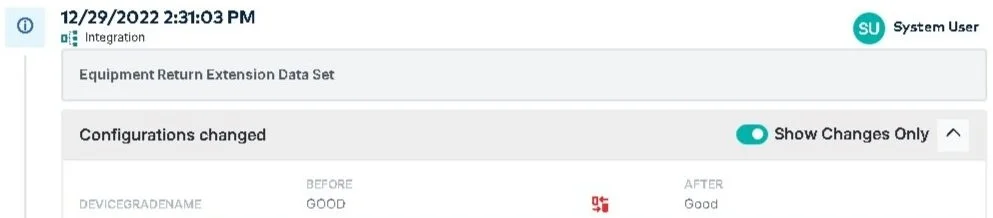
Image 3 – OnlyDiff web block input parameter
LastUpdate – A simple DateTime field to hold the current timestamp.
Whenever updated by the parent page, it will trigger a log list refresh to get the latest records, which is very useful for reacting to asynchronous data changes and keeping the logs displayed up to date.
ShowLogs – A boolean field, False by default, used to skip loading any data until the parent page switches it to true. It is beneficial in scenarios where the component isn’t visible by default, like inside a tab that should only load data when clicked.
Accessory Web Blocks
The main exposed web block component will be a list of log entries. Still, those log entries will be from different types, such as standard information/status change logs, exception/error logs, integrations with the payloads, and even track changes with a before and after look side by side.
These different logs require different sub-components optionally displayed depending on the scenario. Therefore, it’s advisable to have web blocks for those sub-components that will be used on the main list per record when applicable.
DatasetDiff
DatasetDiff is a Web block component displaying the changes to an entity or dataset as a list side by side in a before and after approach for each field, optionally displaying the entire dataset or only the changed fields to reduce noise.

Image 4 – DatasetDiff web block component
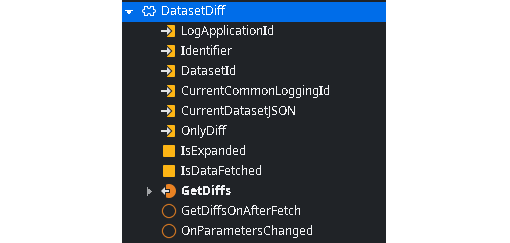
Image 5 – DatasetDiff web block component details
To generate a list of fields from the dataset, with all fields or just the changed one, we can use one of many components available in the OutSystems Forge, like Diff JSON.
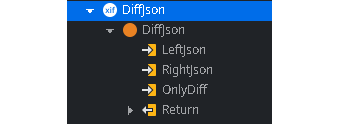
Image 6 – DiffJson component details
JSONPayload
JSONPayload is a Web Block component used to display the JSON Payloads in an indented, colored, formatted, and easy-to-read way, allowing the expansion and collapse of parts of JSON Payloads.
This component should also allow the download of a file with the actual payload from a dedicated context button.

Image 7 – Component used to display easy-to-read JSON Payloads

Image 8 – JSONPayload component details
Once again, several options are available in the OutSystems Forge to display the formatted JSON on the screen. In this case, we picked one that is best suited for a reactive UI: Render Json Reactive.

Image 9 – RenderJsonReactive component details
Use Case Patterns
So far, we have covered this component's different aspects, except how and where to use it in the code. This implementation is dynamic, so covering all the use cases would be difficult. But we will present a few of the most common use case patterns.
Basic Exceptions
For all common exceptions in any action flow, even when you still want the exception to be escalated, it is still possible to create a log entry.

Image 10 – Creating log entries for all common exceptions
Integrations
A widespread and valuable use case is applying it to all integrations, especially with external systems (see image 7). You can choose to log only the most important fields, which are easy to understand by any end-user, or extend it further and include the input and output payloads for technical users, thus removing the need to dig through the Service Center logs or any other external tool to find the payload – often a time-consuming task.
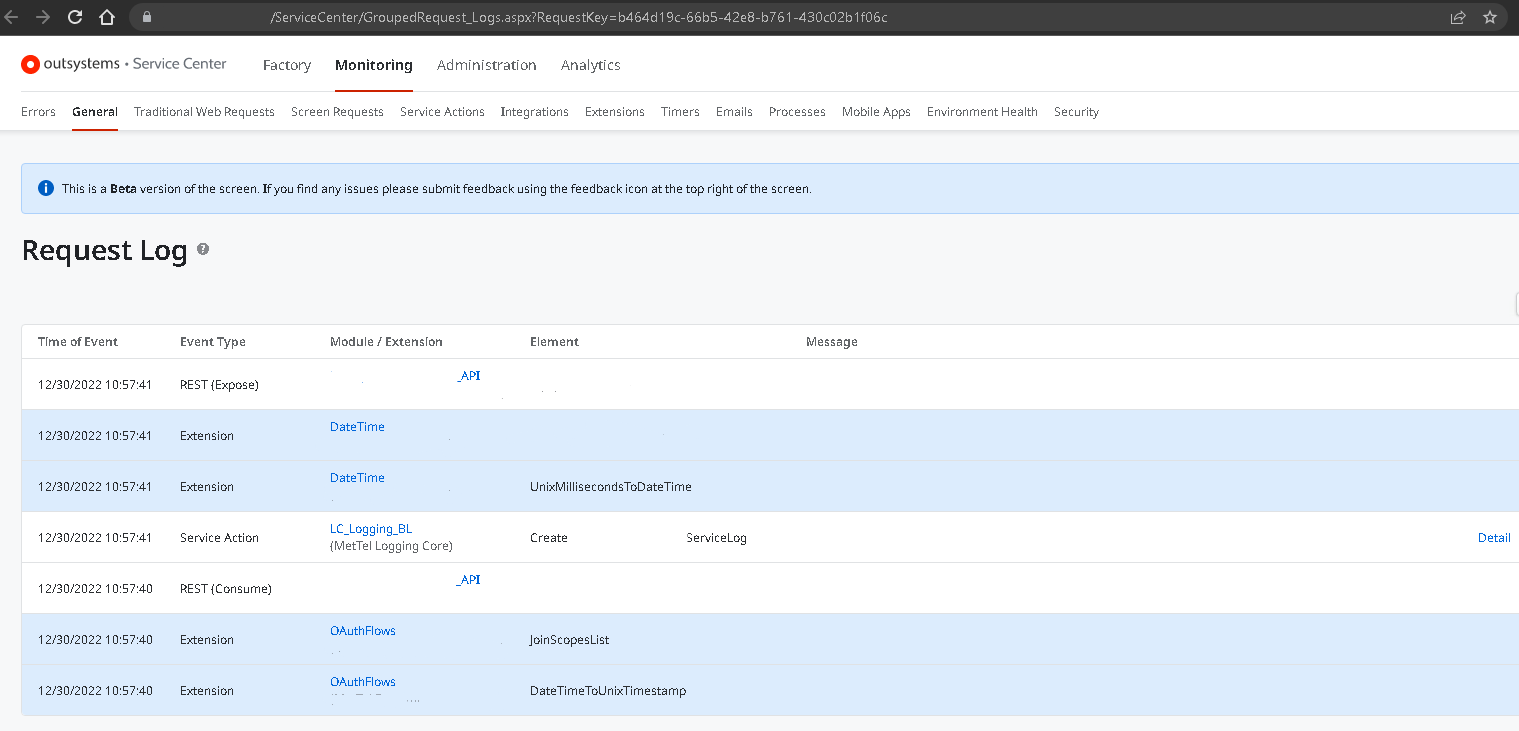
Image 11 – Service Center Log Details
But even digging through the service center becomes straightforward since it includes a link—View in Service Center—on each log entry, pointing to a page with all the different steps of a specific transaction based on the Key Id provided by the PlatformRuntime_API.

Image 12 – PlatformRunTime_API details
Additionally, we can log both the success and failure scenarios.
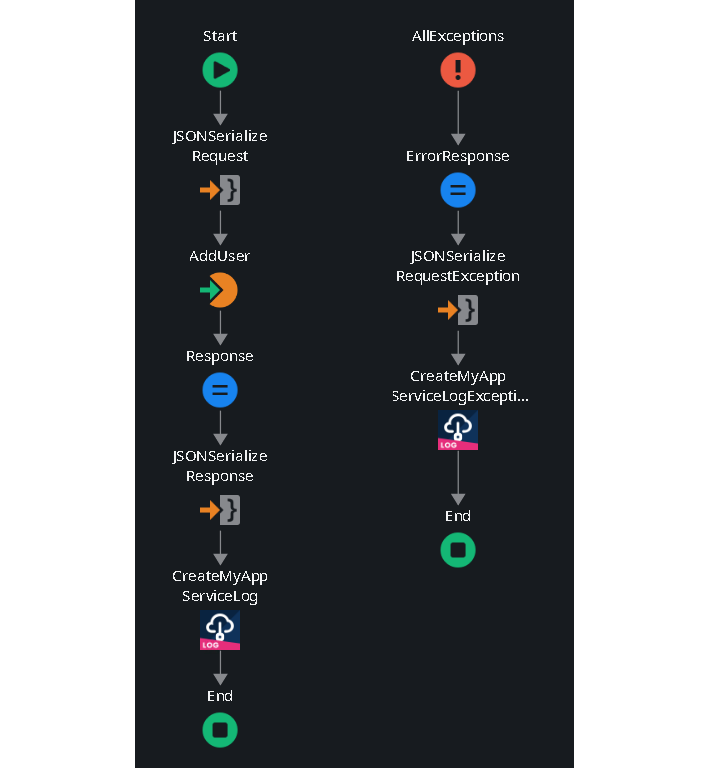
Image 13 – Logging both success and failure scenarios
We can also add as many content lines as needed for each field or detail we want to give emphasis to and optionally use the JSONPayload input field to pass the input and/or output payloads. When passing both, we can use the function ConcatenateJSONPayloads() exposed from the core.

Image 14 – Adding as many content lines as needed for each field or detail
Track Changes
It can be used to show data changes on the UI made by users to a dataset through time but can also be used to track full data model entity changes or initialization (see Image 4).
It is straightforward to use; just serialize to JSON from an entity or dataset record once again.
Assign that JSON to the DatasetJSON input field and name the DatasetId input field with a unique name, usually, the entity or dataset name, that the log will use to compare with the previous log entry payload from the same DatasetId.
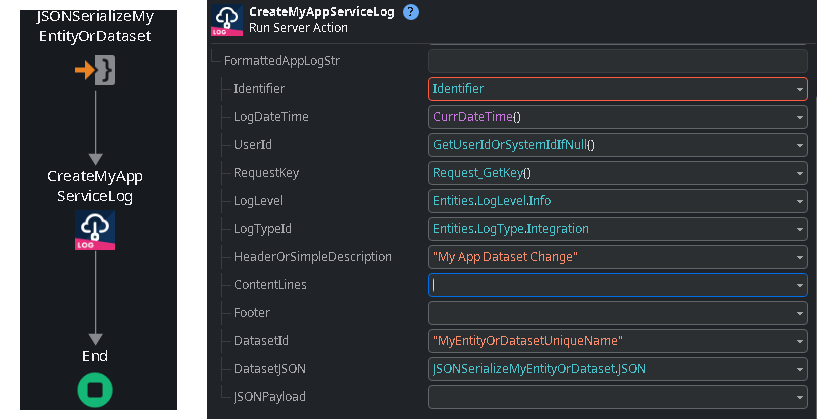
Image 15 – Assign JSON to the DatasetJSON input and add a unique name to the DatasetId input
Closing
Thank you for accompanying me through this comprehensive two-part journey. I hope these insights have been informative and practically beneficial for your daily endeavors in OutSystems. Our objective was to present a high-level guide, illuminating the path to creating a balanced, reusable, and user-friendly solution adaptable across various applications, whether in a single OutSystems factory or multiple.
Your thoughts and inquiries are always welcome. Please don't hesitate to reach out for more information on this topic. Also, please explore our website for additional articles that might spark your interest and contribute to your professional growth in OutSystems. Your engagement and feedback are invaluable, and I look forward to sharing more insights with you.
Like this article? Share it:


